Wenn Sie darauf aus waren, Ihre eigenen Schriftarten in Elementor hochzuladen und zu installieren, dann ist dieser Artikel genau das Richtige für Sie!
In Bezug auf Design spielen Schriftarten eine sehr wichtige Rolle für jede Website. Eine richtig ausgewählte Schriftart repräsentiert letztendlich das Unternehmen oder die Marke.
Elementor ist einer der beliebtesten Builder zum Erstellen von Websites auf WordPress und verfügt über erweiterte Funktionen, einschließlich der Möglichkeit, Ihre eigenen Schriftarten hinzuzufügen. Zusätzlich verfügt Elementor über eine eigene Schriftartenbibliothek, die auf Google Fonts basiert.
Neue Schriftarten in Elementor installieren
Die Funktion „Benutzerdefinierte Schriftarten“ ist nur in der Elementor Pro-Version verfügbar. Wenn Sie bereits Ihre eigene Schriftart erstellt haben oder ein Designer Ihnen eine zur Verfügung gestellt hat, stellen Sie zuerst sicher, dass das Format vom Elementor-Plugin unterstützt wird.
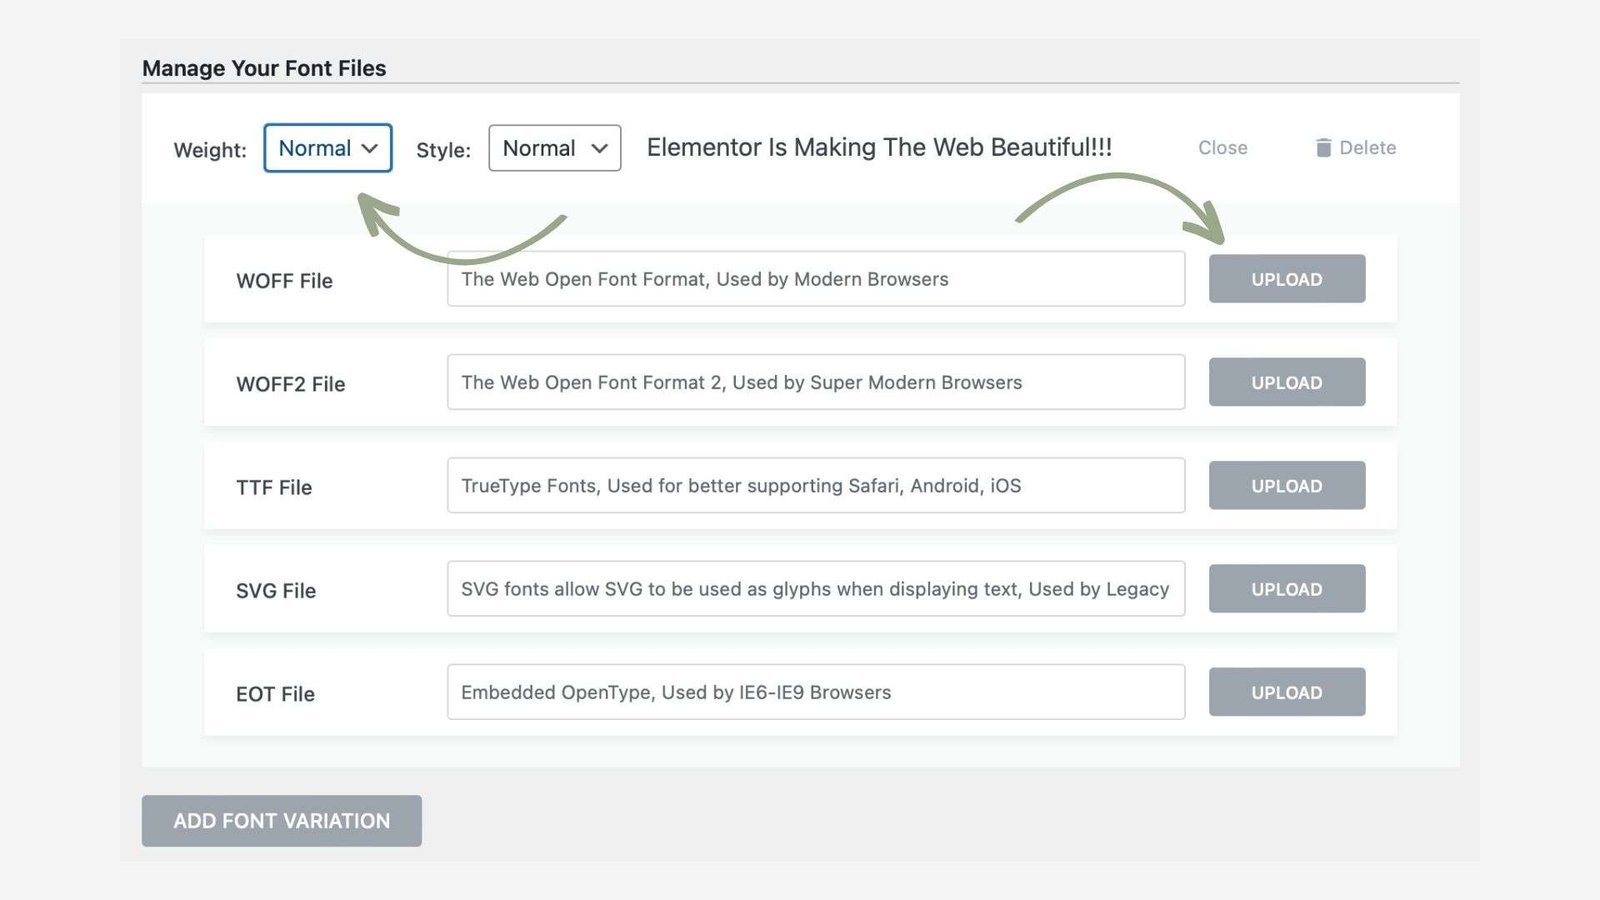
Unterstützte Formate: WOFF, WOFF2, TTF, SVG, EOT
Sobald Sie sich für das Format entschieden haben, ist es an der Zeit, die Schriftart in Elementor hochzuladen. Gehen Sie zum WordPress-Admin-Panel und finden Sie den Abschnitt „Elementor > Benutzerdefinierte Schriftarten„. Auf dieser Seite klicken Sie auf die Schaltfläche „Hinzufügen„.

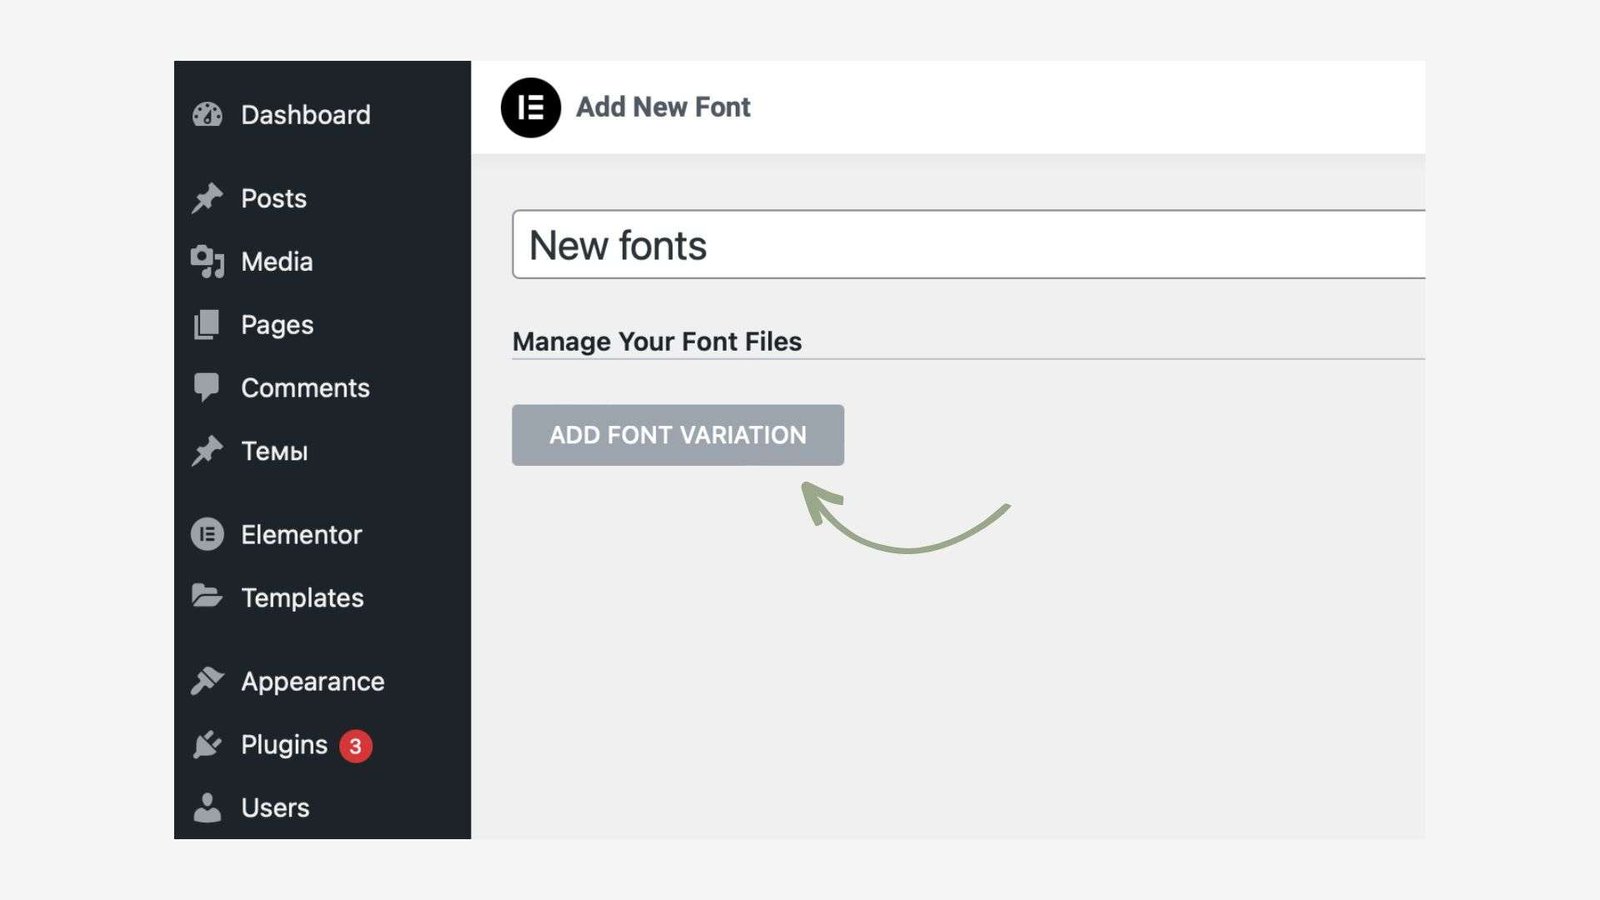
Der nächste Schritt erfordert, dass Sie sich einen Namen für Ihre neuen Schriftarten ausdenken, damit Sie später die neuen Schriftarten in der Bibliothek finden können. Klicken Sie dann auf die Schaltfläche „Schriftartvariante hinzufügen„.

Im oberen Panel wählen Sie das Gewicht und den Stil der Schriftart, dann laden Sie unten die neue Schriftart im erforderlichen Format hoch und klicken auf „Hochladen„.

Wenn Sie mehrere Varianten hochladen müssen, wiederholen Sie die gleichen Schritte. Wenn alles fertig ist, vergessen Sie nicht, auf „Veröffentlichen“ zu klicken, um Ihre Schriftart in der Elementor-Bibliothek verfügbar zu machen.
Wie Sie sehen können, ist der Prozess des Hinzufügens von Schriftarten nicht kompliziert, aber nicht alle Benutzer können schnell alle Nuancen und Feinheiten von Elementor herausfinden. Daher, wenn Sie Fragen zu diesem Thema oder anderen haben, schreiben Sie in die Kommentare oder an mich persönlich, ich werde gerne helfen!

